
Welding 304 Stainless Steel demands control, patience, and practical judgment. This popular austenitic grade resists corrosion, but it can still distort, discolor, or develop contamination during fabrication. A clean bench matters. So does disciplined preparation.
This guide presents ten practical tips for producing stronger, cleaner welds on 304 stainless steel. It covers joint cleaning, fit-up, shielding gas, heat control, electrode selection, and post-weld treatment. Small details often decide the result. A fingerprint near the joint can contribute to surface contamination. Excessive heat can leave a wide, blue heat-affected area and increase distortion.
Experienced fabricators know that recommended settings are starting points, not guarantees. Material thickness, joint design, welding position, and equipment condition can change the outcome. That assumption can fail. Test coupons provide useful evidence before production begins. Record amperage, travel speed, gas flow, and visible weld behavior. Review the bead after cooling, not only while it is bright.
Safety remains essential. Use appropriate eye, skin, and respiratory protection, especially when cleaning or welding in poorly ventilated areas. Follow equipment instructions and applicable workplace standards. If the joint carries pressure, structural loads, or sanitary requirements, qualified inspection may be necessary. Good technique helps, but it does not replace engineering review.
Some mistakes are unavoidable. Learn from them. A slightly uneven bead can reveal rushed movement, poor fit-up, or unstable shielding. By examining these signs honestly, welders can improve consistency and protect the corrosion resistance that makes 304 stainless steel valuable.
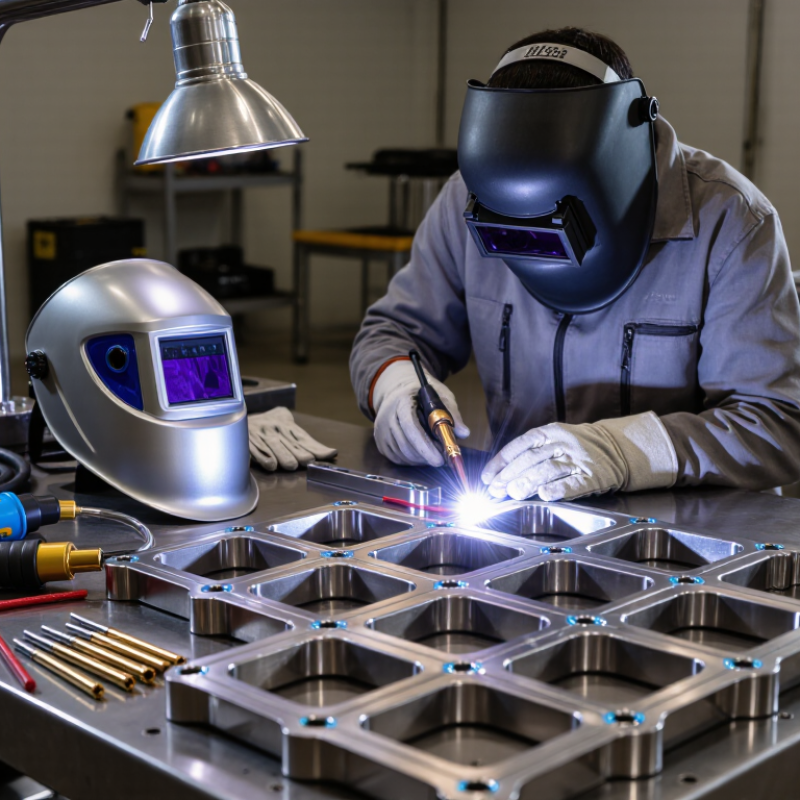
Choosing the right equipment is the foundation of clean 304 stainless steel welds. For thin sheet, I usually select a TIG setup with precise amperage control and a high-frequency start. TIG gives better control around corners, where excess heat can quickly discolor the metal. MIG can work well on thicker sections, especially when production speed matters. Use a stainless-compatible liner, clean contact tip, and a short stick-out to stabilize the arc.
Material selection matters just as much. ER308L filler wire is a practical match for most 304 applications. For repeated heating or demanding service, confirm the project specification before choosing filler metal. Use high-purity argon for TIG shielding, and add a separate argon purge inside tubing or pipe. The back side can sugar without it. That rough, black texture often means oxidation and weak corrosion resistance.
Keep abrasives and wire brushes reserved for stainless steel. Carbon-steel dust can leave rust spots later. I prefer a dedicated stainless brush and acetone-based surface cleaning before welding. Fit-up should be tight, but not forced; uneven gaps invite extra heat. Short welds, balanced sequencing, and brief pauses help control distortion. I once trusted a strong tack weld too much, and the final joint pulled out of alignment. That mistake still influences how I check fixtures, gaps, and heat input before starting.
Typical GTAW starting-current ranges for 304 stainless steel at different material thicknesses. Actual settings depend on joint design, welding position, tungsten size, heat-sink conditions, and the welding process.
Preparing the joint correctly often decides whether a 304 stainless steel weld stays clean and strong. Cut the edges square, then remove burrs with a dedicated stainless steel file. Keep the fit-up tight and even. Large gaps increase heat input and distortion. Wipe both sides with a clean, lint-free cloth and an approved solvent. Let the surface dry completely.
Tip 1: Use stainless-only brushes, files, and clamps. Carbon steel particles can create rust-colored stains later. Tip 2: Remove oil, fingerprints, oxide, and marker residue before welding. Do not rely on heat to burn contamination away. It can leave stubborn defects. I sometimes recheck the joint after handling it, because clean metal becomes dirty quickly in a busy workshop.
Tip 3: Clean the surrounding area, not only the weld line. Dust from grinding can settle on the prepared surface. Use fresh gloves after touching greasy tools or fixtures. Avoid abrasive wheels previously used on mild steel. A separate preparation kit is worth the small extra effort. Inspect the joint under bright light. It should look uniform, dry, and free from visible particles. If the surface still feels tacky, stop and clean it again. That extra pause may prevent porosity, discoloration, or a weak start.
304 stainless steel rewards control, but it quickly exposes careless settings. In shop trials, I start with low, stable heat and increase it only when fusion remains incomplete. Excessive heat widens the weld pool, increases distortion, and can discolor the surrounding metal. Use DCEN for TIG welding and DCEP for MIG welding. These are starting points, not fixed rules.
For TIG work, pure argon commonly provides a steady arc. Set flow near 10–15 L/min, then adjust for nozzle size and surrounding drafts. Too little gas allows oxidation, while excessive flow can create turbulence. Keep the torch close and maintain a short arc length. Back-purge tubing and closed joints when the root may oxidize. Sugaring on the backside is a warning sign.
Choose a low-carbon stainless filler, such as a 308L classification, when it suits the joint. Match wire diameter to material thickness and avoid excessive wire feed speed. Keep interpass temperature controlled, often below 150°C for thin 304 sections. A temperature probe is more reliable than touch. Clean the joint with dedicated stainless tools, because carbon steel particles can create rust spots later. I still find that one “perfect” parameter set rarely survives every joint position. Watch the puddle, record changes, and question results that look acceptable too quickly.
Top 10 Tips for Welding 304 Stainless Steel
Control distortion before striking the arc. Clean oil, oxide, and fingerprints from both joint faces. Use a narrow root gap and consistent fit-up. Tack welds should be small, evenly spaced, and placed from the center outward. A copper backing bar can support the puddle and draw away excess heat. For root welds, shielding the reverse side with clean gas helps prevent heavy oxidation.
Keep amperage and travel speed steady. Excessive heat spreads through the sheet and enlarges the heat-affected area. Use short weld segments, alternating sides when possible. A skip or backstep sequence often reduces visible warping. Avoid forcing cold parts into alignment with excessive clamps. That restraint may move distortion into another section. Limit interpass temperature, commonly below about 150°C, unless the qualified procedure states otherwise. Let the metal cool naturally.
Watch the color and shape of the bead. A wide, dull bead may indicate too much heat. A perfect-looking weld can still conceal sensitization or incomplete fusion. I once focused too heavily on bead appearance and missed heat buildup near a corner. That mistake changed my inspection routine. Check dimensions between passes, not only at the end. Use straightedges, temperature crayons, and visual inspection around the HAZ. Small corrections are easier. Keep records of settings and warping results; your next joint may need a different sequence.
Top 10 Tips for Welding 304 Stainless Steel
Inspecting a 304 stainless steel weld starts after cooling, not immediately. I check the bead under bright, angled light. This reveals undercut, pinholes, overlap, and surface discoloration. Uneven color often signals excessive heat or poor shielding. A calibrated weld gauge helps verify leg size and profile. ISO 5817:2023 provides acceptance guidance for visible weld imperfections. However, acceptance depends on the specified quality level.
Cleanliness is critical. I remove oil, fingerprints, and carbon-steel particles before inspection. Dedicated stainless tools prevent iron contamination. A clean, lint-free cloth and suitable solvent work well. Never grind across the joint with a contaminated wheel. Light brushing can remove oxide, but aggressive grinding may create grooves. I have made that mistake. The joint looked cleaner but needed rework.
Finishing should restore corrosion resistance, not merely improve appearance. Pickling or controlled mechanical finishing can remove heat tint. Follow the chemical supplier’s safety instructions and verify the surface afterward. OSHA limits hexavalent chromium exposure to 5 micrograms per cubic meter over eight hours. NIOSH recommends a far lower exposure limit of 0.2 micrograms per cubic meter. Local extraction and suitable respiratory protection remain essential. Final inspection should include visual checks, dimensional verification, and dye penetrant testing when service conditions demand it. Document the method, temperature, cleaning tools, and results for reliable traceability.
| No. | Stage | Recommended Practice | Key Data or Setting | Inspection Point | Expected Result |
|---|---|---|---|---|---|
| 1 | Material Verification | Confirm that the base material is 304 stainless steel and review the applicable drawing, welding procedure, and filler-metal requirements before work begins. | Use material certificates, heat numbers, or positive material identification when required by the project. | Check thickness, joint design, edge condition, and traceability markings. | Correct material and approved welding requirements are confirmed before setup. |
| 2 | Joint Preparation | Prepare square, bevel, or fillet joints according to the approved procedure. Remove burrs, sharp edges, and oxide from the weld zone. | Maintain consistent root opening, alignment, and bevel geometry; use the drawing or WPS as the controlling specification. | Inspect fit-up, tack welds, root access, and distortion restraint before welding. | Uniform fit-up with no visible gaps, steps, oil, paint, or heavy oxide in the fusion area. |
| 3 | Cleaning Before Welding | Degrease the joint with a suitable solvent and wipe with clean, lint-free cloths. Use dedicated stainless-steel tools to prevent iron contamination. | Do not use carbon-steel brushes, grinding wheels, or tools previously used on carbon steel. | Perform a visual check under good lighting after solvent evaporation. | Surface is dry and free from oil, grease, marker residue, dirt, moisture, and embedded iron particles. |
| 4 | Shielding Gas Control | Use clean, dry shielding gas suitable for the selected welding process. Protect the weld pool and the hot root from atmospheric contamination. | For many TIG applications, high-purity argon and approximately 8–15 L/min are common starting points; adjust for cup size, draft, and WPS requirements. | Check regulator condition, hose leaks, gas coverage, and purge quality where a full-penetration root is required. | Stable arc, smooth bead appearance, and no excessive gray, black, or sugared oxidation. |
| 5 | Filler Metal Selection | Select filler metal compatible with 304 stainless steel and the service environment. 308L-type filler is commonly used for 304-to-304 joints, subject to the approved procedure. | Keep filler wire clean, dry, and protected from shop contamination; match diameter to joint thickness and process. | Verify filler classification, diameter, storage condition, and lot traceability when required. | Filler metal is metallurgically suitable and produces a sound, corrosion-resistant weld. |
| 6 | Heat Input and Technique | Use a controlled travel speed, short arc length, and consistent torch angle. Avoid excessive heat that can increase distortion and reduce corrosion resistance. | Control amperage, voltage, travel speed, and bead sequence according to the WPS. Keep interpass temperature within the specified limit; a limit near 150°C is commonly used for austenitic stainless work unless the procedure states otherwise. | Monitor bead shape, heat tint, distortion, and interpass temperature where specified. | Even bead profile, limited distortion, adequate fusion, and controlled discoloration. |
| 7 | Protection from Contamination | Separate stainless-steel work areas and tools from carbon-steel fabrication. Keep abrasive dust, grinding sparks, and chloride-containing materials away from the joint. | Use stainless-dedicated brushes, files, abrasives, clamps, and work surfaces. | Inspect the weld area and surrounding surface for embedded particles, rust spots, and foreign material. | No cross-contamination that could cause surface rust or localized corrosion after fabrication. |
| 8 | Visual Inspection | Inspect the weld after it has cooled sufficiently. Examine the face, toe, crater, start-stop areas, root where accessible, and adjacent base metal. | Look for cracks, lack of fusion, incomplete penetration, undercut, overlap, porosity, arc strikes, excessive reinforcement, and unacceptable distortion. | Use project acceptance criteria or the governing fabrication code; visual inspection alone does not replace required NDT. | Continuous weld with acceptable profile and no visible defects exceeding the specified limits. |
| 9 | Mechanical Cleaning | Remove light heat tint and weld residue with dedicated stainless abrasives or stainless-steel brushes. Blend the surface without gouging the base metal. | Use progressively finer abrasives when a uniform finish is required; avoid excessive pressure and overheating. | Check that grinding marks, burrs, spatter, and sharp edges have been removed. | Clean, smooth surface with no embedded abrasive, deep scratches, sharp projections, or remaining weld spatter. |
| 10 | Chemical Finishing and Final Check | Where specified, use an appropriate citric or nitric-based passivation process, or an approved pickling method, to restore the stainless surface after welding. Follow chemical handling instructions. | Thoroughly rinse and neutralize or dispose of chemicals according to the process instructions and applicable safety requirements. | Confirm removal of heat tint, absence of chemical residue, acceptable surface appearance, dimensional compliance, and required NDT completion. | Uniform corrosion-resistant surface, dry and residue-free, with inspection records completed and the joint released for service. |
Contact our Specialists