
Skip to content

How to Install a Two Panel Barn Door?

Installing a Two Panel Barn Door looks simple, but small measurement errors can create serious problems. Two separate panels must travel smoothly, meet evenly, and remain secure during daily use. This guide explains how to plan the opening, choose suitable hardware, and complete the installation with practical accuracy.

Tom Silva, a master carpenter known for This Old House, often applies the workshop rule, “Measure twice, cut once.” That advice matters here. Measure the doorway width, wall space, panel height, and floor clearance before drilling. A typical setup needs enough wall length for both panels to slide apart without blocking trim, switches, or furniture. The header must connect with wall studs, not only drywall. Heavy doors require stronger support.

Check the panels on a flat surface. Their edges should align closely, though handmade wood may show slight variation. That is acceptable. Perfect symmetry is not always realistic. Still, uneven gaps can reveal poor preparation. Install the track level, attach the rollers according to the manufacturer’s instructions, and test movement before tightening every fastener. Add anti-jump hardware and a floor guide to limit swinging.

This Two Panel Barn Door installation guide also addresses common mistakes, including weak anchoring, insufficient clearance, and incorrect panel overlap. Expect a few adjustments. Wood can shift with humidity, and walls are rarely perfectly straight. Careful measuring, solid fastening, and patient testing create a quieter, safer, and more reliable result.
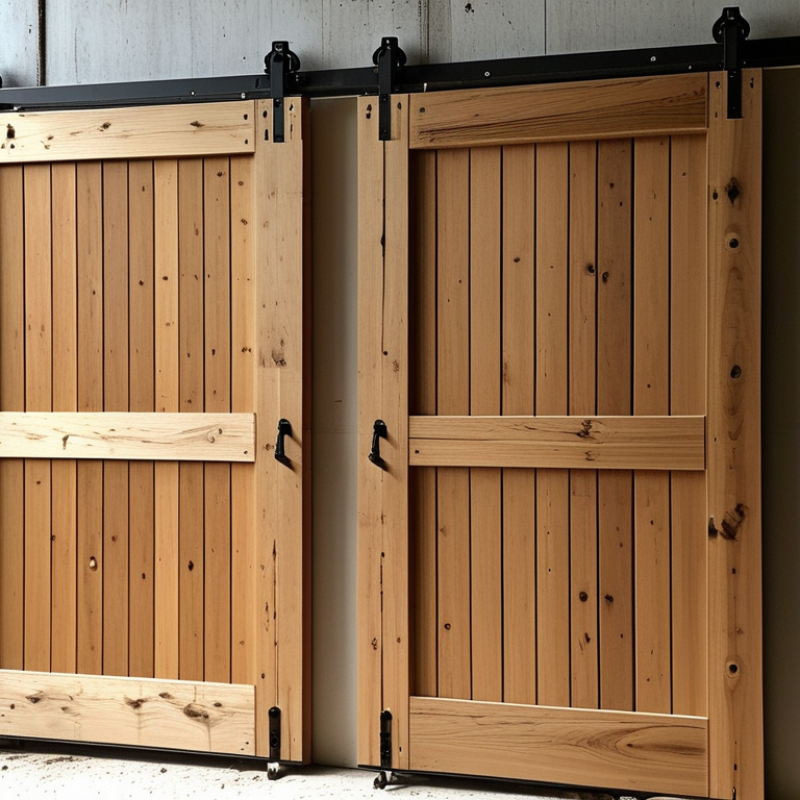
How to Install a Two Panel Barn Door?

Assess the Wall and Choose the Right Two-Panel Barn Door

Before installing a two-panel barn door, inspect the wall carefully. Find every stud with a stud finder, then mark their centers. A sliding door can pull outward when opened, so drywall anchors alone are unreliable. Check for wiring, plumbing, uneven plaster, and weak framing. The 2023 Remodeling Futures Program estimated nearly $485 billion in U.S. homeowner improvement spending, showing how often small renovations become major investments. Do not let a stylish door hide a structural problem.

Measure the opening, wall height, and nearby furniture clearance. Each panel should overlap the opening by about 25–50 millimeters on both sides. The track usually needs twice the doorway width for full movement. Choose solid wood or engineered panels only when the wall and hardware support their combined weight. Professional installation guidance commonly recommends a reinforced backing board across several studs, especially on masonry or older walls. I once underestimated trim thickness; the panel moved, but the latch area became awkward. Measure twice.

Tips: Leave enough space for handles, baseboards, and electrical switches. Use a level across the entire track, not only at the ends. Test the rollers before tightening every screw. A floor guide reduces swinging, but it cannot correct a crooked wall. The International Building Code and local accessibility rules may also affect door placement, especially near bedrooms and corridors.

Gather Tools, Hardware, and Door-Installation Materials

Before installing a two-panel barn door, gather every tool and fitting near the work area. You will need a tape measure, pencil, level, stud finder, drill, drill bits, screwdrivers, wrenches, and safety glasses. Keep a socket set nearby if the track uses hex bolts. Two sturdy sawhorses can support each door safely during handle installation. Check the wall width, opening height, and door overlap before buying hardware. The track should extend beyond the opening enough for both panels to clear the doorway.

Confirm that the hardware kit includes rollers, track spacers, mounting bolts, door stops, floor guides, and anti-jump devices. Use fasteners suited to your wall and locate solid framing behind the track. Wall anchors alone may not support heavy doors. Measure the door thickness before selecting bolts, because overly long bolts can damage the door surface. I once skipped this check and had to replace two fasteners. Small mistakes become visible later.

Tips: Lay out the parts on a clean cloth and compare them with the installation guide. Mark each panel’s top edge before lifting it. Pre-drill holes carefully to prevent splitting. Keep the level within reach throughout the setup. If the floor is uneven, test the floor guide position with both doors moving together. Leave clearance for handles, trim, and baseboards. A second person makes lifting safer and helps keep the track steady.

Measure the Opening and Mark the Track Position

Measure the finished opening at the top, middle, and bottom. Record the largest width, because walls are rarely perfect. Measure from the finished floor to the header, not the subfloor. For two panels, each door should cover half the opening plus a small center overlap. Many hardware guides recommend at least 2 inches of side overlap, but the supplied instructions must control. The total track length is often about twice the opening width, allowing both panels to slide clear. Check this calculation twice.

The 2024 Houzz & Home Study reported that 54% of surveyed homeowners completed renovation projects in 2023. That interest makes accurate preparation more important, especially for interior sliding doors. Hold the track above the opening and mark its position after adding the door height and the manufacturer’s clearance. Keep the lower edge level across the wall. Use a long level, then mark every stud or solid blocking point behind the track. Never rely on drywall alone. A loaded door can expose weak support quickly. I once marked from an uneven floor and created a needless gap. Measure again. Leave enough clearance for the floor guide, trim, and handle. Also check that furniture, switches, and nearby doors will not obstruct the panels when fully open.

This example shows typical measurements for planning a two-panel barn door installation. Measure the opening first, confirm the panel overlap required by the hardware, and mark the track position above the opening. Always verify clearances and load requirements with the selected hardware instructions.

Install the Mounting Board, Track, and Door Rollers

How to Install a Two Panel Barn Door?

A stable mounting board carries the track and spreads the door load across several wall points. Measure both panels together, then add the manufacturer’s required overlap and side clearance. Use a stud finder before drilling. Mark every stud clearly. If the wall has no suitable stud, install certified structural blocking behind the surface. A weak fixing can loosen when the doors move repeatedly. The 2024 International Residential Code emphasizes secure attachment for heavy wall-mounted components, although barn-door hardware still requires its own load rating.

Hold the mounting board level, not parallel to a sloping floor. This small difference affects how the panels meet. Pre-drill through the board, then tighten lag screws into the studs. Avoid crushing the timber.

Attach the track only after checking its height against the tallest panel. Fit each roller squarely on the upper rail, with equal spacing from the door edges. The rollers should turn freely.

Add anti-jump guides and floor guides before testing both panels. Open each door slowly and listen for scraping, clicking, or uneven resistance.

Tips:

The 2024 Houzz & Home Study reports that 84% of renovating homeowners hired professionals for at least one project. Ask for a second inspection if the wall feels uncertain. My first installation left too little overlap between panels. It looked acceptable, but light passed through the center seam.

Recheck clearances, screw depth, and roller alignment before final tightening. Short checks prevent expensive rework.

Hang, Align, and Test Both Barn Door Panels

How to Install a Two Panel Barn Door?

Hang, Align, and Test Both Barn Door Panels

Installing two sliding panels requires more than attractive hardware. Measure the opening, wall clearance, and header strength before unpacking anything. The U.S. Department of Energy reports that windows and doors may account for 25% to 30% of residential heating and cooling energy use. An interior barn door cannot replace a rated exterior door, but accurate alignment can reduce light gaps, drafts, and noise transfer. Use a structural backing board when studs do not match the track holes.

Mark the track line with a laser level. Leave the specified clearance above the opening. Secure every fastener into structural material, not drywall alone. Hang the heavier panel first, then install the second panel. Keep both rollers seated on the track. Add floor guides only after checking the panels’ travel. A guide that sits too tightly can create rubbing and uneven movement. Small details matter.

Close both panels slowly. Check their overlap, edge spacing, and contact with the stops. Test the doors several times from different angles. My first installation looked level until the panels met; the lower edges differed by nearly 6 millimeters. Rechecking the header exposed a slight wall variation. Correct it with approved shims, not force. The National Association of Home Builders continues to identify durability and low-maintenance features as important buyer priorities in its housing preference research. Smooth rolling, firm stops, and replaceable guides support that expectation. Test again. Only then tighten the final adjustment screws.

How to Install a Two Panel Barn Door? - Hang, Align, and Test Both Barn Door Panels

Step Installation Task Recommended Dimension or Requirement Tools and Materials Verification Check
1 Measure the opening Measure the finished opening width and height at several points. Use the smallest width and height recorded. Tape measure, pencil, level The opening is square, and the measurements are recorded before hardware is installed.
2 Confirm panel coverage For two panels, the combined panel width should cover the opening and provide approximately 50–75 mm of overlap on each side when closed. Tape measure, installation instructions Both panels cover the opening without exposing the side gaps in the closed position.
3 Locate wall framing Identify studs or install a properly supported mounting board. The track must be fastened to structural material rather than drywall alone. Stud finder, drill, mounting board, screws Each required mounting point has secure structural support.
4 Mark track height Leave the clearance specified by the hardware instructions between the top of each door panel and the track. A common starting point is 25–50 mm. Level, pencil, measuring tape The reference line is level across the entire travel area.
5 Install the mounting board or track Use the fastener type and spacing specified for the wall construction and track. Keep the track straight and fully supported. Drill, bits, wrench, screws, level The track does not flex, twist, or move when moderate hand pressure is applied.
6 Attach hangers to both panels Position the two hangers on each panel according to the supplied template, keeping them evenly spaced and aligned. Hangers, bolts, wrench, screwdriver All hanger bolts are tight, and the hardware sits flat against the door surface.
7 Hang the first panel Lift the first panel onto the track with assistance. Keep fingers clear of pinch points during placement. Two-person lifting support, step ladder if needed The panel sits evenly on the track and rolls without binding.
8 Hang the second panel Place the second panel on the same track and maintain the required center overlap or meeting clearance specified by the hardware design. Two-person lifting support, wrench Both panels roll independently and do not collide during initial movement.
9 Install door stops Install end stops at both ends of the track and any center stops required for the two-panel configuration. Stops, wrench, screwdriver Each panel stops before reaching the end of the track or contacting nearby trim.
10 Fit floor guides Position one guide for each panel or use the guide arrangement supplied with the hardware. The guide should control sway without lifting the panel. Floor guides, drill, screws, level Panels remain stable and move without scraping the floor or guide.
11 Align both panels Adjust hanger nuts so the panel bottoms are level. Check the top edges, center meeting line, and side overlap. Level, wrench, tape measure The panels are level, the center gap or overlap is consistent, and no panel leans forward or backward.
12 Test the complete movement Open and close each panel slowly several times, then operate both panels together through their full travel range. Level, wrench, silicone-free dry cloth Movement is smooth, the panels remain aligned, and there is no rubbing, excessive noise, or track movement.
13 Complete the safety inspection Recheck structural fasteners, stops, guides, hanger nuts, and pinch-point clearances after testing. Wrench, screwdriver, level All fasteners are secure, the track is stable, and the panels cannot leave the track during normal operation.
Important: Fastener sizes, track capacity, panel weight limits, clearances, and hanger positions vary by hardware design. Always follow the supplied installation instructions for the specific door system.